|
|
|
A note on wire: Using the right wire for the string is
important. Please see the page Wire for the String.
A WORD OF WARNING/DISCLAIMER: If you decide to try to build a diddley
bow of any sort, be aware that the wire may be of unknown tensile strength and is being brought to unknown tension; in addition,
if you use a glass jar or bottle as a bridge , remember it is under compression, and the board being used is under tension.
I suggest using safety goggles and gloves when bringing the wire string to tension. I have had
a glass baby food jar bridge shatter as I was attempting to bring the wire to a higher tension. Glass flew everywhere.
Be careful to keep your face out of the way of the wire—I do not know what would happen if the wire should break (it
has not happened to me—so far) but please use sense when building, tuning and playing these instruments.
I first take a piece of 2 x 6 or 2 x 4 lumber and cut it to about 3 feet long. I then use
a pencil to mark the center line along the length of the broad side of the board. I then drive two 10 penny
or larger nails into the center line about one inch in from each end, angling the nails so that they slope toward the ends
of the board. Next, I take a length of 16 gauge galvanized steel wire and wrap one end of the wire around
one of the nails for a couple of turns and then around itself. 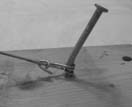 I wrap the wire around the other nail for a couple of turns (using pliers to keep it
as tight as possible), and then around itself, and cut off the extra. I keep the wire close to the board
at both ends, and try to get it as tight as I can. If the wire is too high on the nails, the nails will
bend when the required tension is put on the wire.
For the bridge, I use a small, cylindrical jar or bottle made of thick glass with straight, not tapered sides, such as a jelly jar, an instant yeast jar, or a hot sauce bottle. A large pipe coupling also works well. The glass in a baby food jar is too thin, and will break easily. 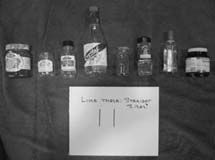 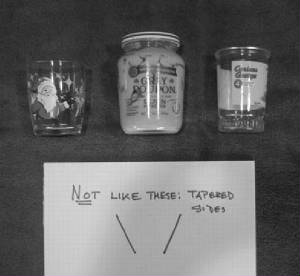
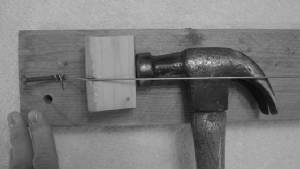
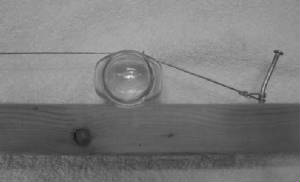 Once the jar is in place, I then install what a guitarist would call the "nut."
I slip a small scrap of wood (e.g., 1 x 2 or toy alphabet block) under the string and push it towards the other nail,
pushing it as far as I can. I then use a small hammer to whack the wood nut (not the jar!) towards the
nail.
  At this point, the wire should sound "bright" when struck with a stick.
If it still gives a dull thump, the wire needs to be a little tighter. If the string is as tight
as it will go with the current block of wood and still sounds dull, I would suggest trying a larger (taller) block of wood
to increase string tension. A slightly more difficult solution is to use a larger bottle, or to restring,
getting the wire a little tighter to start with. Remember, none of these things are terribly difficult.
TROUBLESHOOTING: One problem with this configuration is that the bottle tends to slip away from the nail, causing the diddley bow to go flat (usually in the middle of a song). Broom wire does not seem to suffer this problem as it tends to be corroded, which grips the bottle. One method to address this problem is to push the bottle as close as you can get it to the nail, and then mark where the bottle rests on the board. 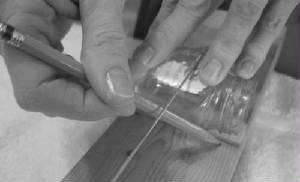 Slip the bottle away from the nail past this mark and then (with a half-round combination
wood rasp) rasp out a groove across the board for the bottle to fit into.
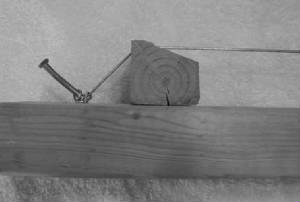
 An alternative method is to find the position of the bottle that gives
the maximum tension, and mark this position on the board. Then mark a line perpendicular to the center
line about ¼" to 3/8" further from the nail, and drill two holes on this line about ½" on each
side of the center line. Screw two round-head wood screws (I used 1-1/2" #8 screws) into the board,
leaving the screws standing about 1/8" proud of the wood. This will act as a detent to prevent the
bottle from moving way from the end nail.
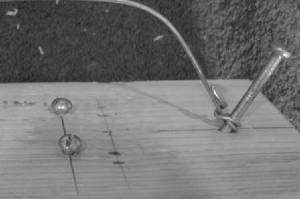 Slip the bottle under the string and over the protruding screws to be positioned between
the 10 penny nail and the screws—if the bottle can't make it, screw in the wood screws a bit more.
 Dropping pitch of the open string |